Palworld dedicated servers can host up to 32 players combing through its islands for Pokémon-like monsters and valuable resources. Developer Pocketpair has plans to increase that number in a future update, as well as add an in-game method for server hosting. Right now, though, hosting your own Palworld dedicated server takes a few extra steps.
To set up a multiplayer server, you need the Steam version of the game. Due to the complexities of updating games on consoles, the Xbox/Microsoft Store/Game Pass version of the game doesn't currently allow dedicated servers of any kind. The only way to have a persistent multiplayer server for you and your friends is to buy it on Steam, and because crossplay isn't a thing yet, your friends will need it there too.
The process to set up a Palworld dedicated server is mostly painless, but keep in mind that other players will need to know your IP address to join. You don't want to go around announcing your IP address to random people, so be careful with who you give it to.
How to setup a dedicated server


You can find detailed instructions on how to set up your Palworld dedicated server below, but here's a brief list of steps:
- Install and launch Palworld once
- Install Palworld Dedicated Server (enable Tools if you don’t see it)
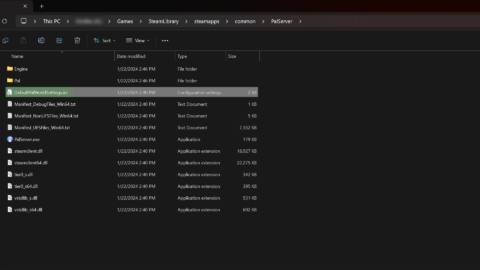
- Open Palworld Dedicated Server installation folder
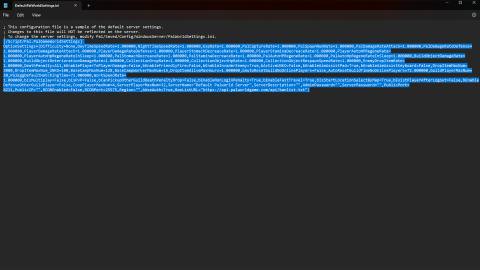
- Open DefaultPalWorldSettings.ini and copy everything below line 3
- Navigate to PalServer\Pal\Saved\Config\WindowsServer and paste text into PalWorldSettings.ini
- Change desired settings then save
- Launch Palworld Dedicated Server
- Choose Play Palworld Dedicated Server and click Play
How to set up your dedicated server
Once you've purchased Palworld on Steam, it'll show up in your game library. You'll need to launch the game once so it creates all the files it needs in its installation folder.
After that, close the game and look for “Palworld Dedicated Server” in your Steam library. If it doesn't show up, click the drop down filter menu above your list of games and enable “Tools”. Before you click Launch, right click Palworld Dedicated Server in the list, hover your cursor over Manage and select Browse local files to bring up its installation folder.
In the folder, there are a number of files, but you only need to worry about “DefaultPalWorldSettings.ini”. For the next step, you need to open it with a program like Notepad by right clicking it, hovering over Open with and selecting your desired text editor.
Select and copy all the text below the third line where it says “To change the server settings…” It should include “[/Script/Pal.PalGameWorldSettings]” and all the text below it. Close the window and go back to the PalServer folder that you were on a second ago.
Now you need to paste all that text into another file. That one is located in PalServer > Pal > Saved > Config > WindowsServer. Among all the ini files in there, you'll see “PalWorldSettings.ini”. Open it with Notepad just like you did the previous file and paste the text in.
You can change a few things in here before you save and close the file. Below is a list of the most important settings you can change by replacing the text between the quotes:
- ServerName – The name of your server
- ServerDescription – A short description of your server
- ServerPassword – A password players need to access the server (passwords require a workaround explained below)
- AdminPassword – A password you’ll need to access admin commands
When you're done, save the file and close it.
It's finally time to get your Palworld server online. Launch Palworld Dedicated Server from your game library. A window will show up asking you if you want to play on a dedicated server or start a community server. Community servers are public and show up in the game's multiplayer menu, but some are having trouble getting theirs to work, so let's skip it for now. Choose Play Palworld Dedicated Server and click Play.
While it's loading up, Windows might ask you to allow public and private networks to access it. Click “Yes”, and wait for a Command Prompt window to appear. You'll need to keep that window open for the server to run regardless of whether you're playing or not.
How to join your dedicated server

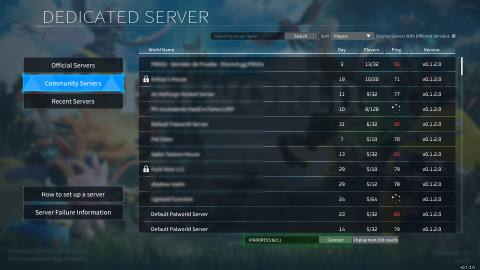
Anyone who wants to play on your new server will need to launch the game and select “Join Multiplayer Game” from the main menu. That option will bring you to the dedicated server browser.
At the bottom of the screen there is a text box to enter the server's IP address into. You can find your external IP by visiting WhatIsMyIP and copying the public IPv4 address. By default, players will need to enter your IP address (or the address of whoever's hosting the server) followed by a colon and the port listed in the settings file from earlier. If you didn't change anything, it should look like this: “YourIPAddress:8211”
Dedicated server password fix
Server passwords don't seem to consistently work correctly in Palworld. If the game says “no password has been entered” when you try to join a server, follow these steps to fix it:
- Select Join Multiplayer Game from the main menu
- Select Community Servers
- Find a server with a lock icon and enter the password for your own server (trust me, it works)
- Select OK and then NO when it asks if you want to connect
- Enter your IP and port number in the bottom text box like normal and hit Connect
How to save and close your server
Technically, you can shutdown your server by closing the Command Prompt window, but it's probably a better idea to use the admin commands. When you're in the game, press enter to open chat, type “/AdminPassword”, hit space, type the admin password you set earlier, and hit enter again. Now you can use commands like “/Save” to save the server and “/Shutdown” to close it.


