
At the start of Valheim you’re dropped off (literally) in Viking purgatory with not much more than the clothes on your back and an idea of how to make a hammer. However, among the game’s many survival systems is the ability to build settlements, including surprisingly deep and versatile possibilities for house design.
On this page:
- How to start building in Valheim
- Building your first shelter
- Building needs to consider: stability, smoke build-up, and more
- Preparing the ground and laying foundations
- Structural stability
- Ventilation
- Building material decay
- Stone buildings in Valheim
- Advanced building projects
- How to turn off snapping while building
How to start building in Valheim
To begin with, building in Valheim is primarily a matter of sheltering yourself from the elements. The night is indeed dark and full of terrors, and it’s also very cold out.

Having a base to work from confers a number of benefits. Valheim has a very variable weather system, so protection from the elements is a major plus. Spending time inside a house makes you feel rested, even if you’re in there crafting at the workbench rather than sleeping. And since your first workbench has to be placed indoors to access all its functions, there’s really no reason not to build a decent shelter to put it in.
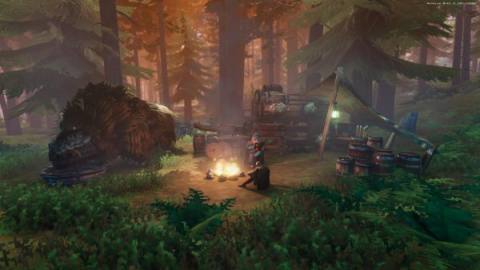
You can start gathering the basic materials for building — stone and wood — as soon as you land in Valheim. You start the game knowing how to craft a hammer, a stone axe, and a campfire — which isn’t much, but it is a start.
Even so, it might take you a couple of in-game days to gather all the resources you need to make your first shelter, especially if you’re playing solo. Even if you can’t do anything else, be sure to place a campfire that first night to fend off the chill.
Once you’ve crafted a hammer and have collected enough stone and wood, you’re ready to begin a basic build.
First off, you need to place a workbench in the area you want to build on. (Yes, you need a workbench to build a shelter and a shelter to make best use of a workbench. That’s early access weirdness for you.) You need to be standing within the radius of the workbench (indicated by a dotted line on the ground) to begin construction.
With the hammer equipped, right-click to bring up the build menu. This should show you every building part you can currently construct.
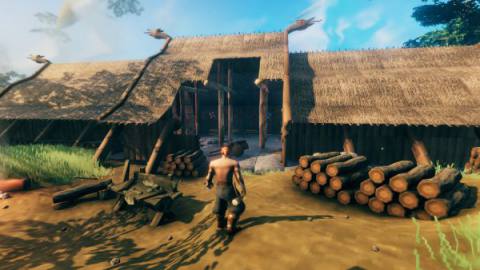
Building your your first shelter
Valheim’s main concern when deciding if something is a shelter or not is whether there’s a roof. It’s actually quite forgiving, however, when it comes to little concerns like how much daylight is visible through that roof. You can even build a three-walled lean-to if you choose, though of course that doesn’t offer as much protection from the elements.
Because time is of the essence, don’t worry too much if your first home in Valheim is a pretty basic set-up enclosed with walls and a roof (just don’t forget to add a door). For now, it doesn’t need to be pretty. Which is fortunate, because it can take a little while to get to grips with Valheim’s building system.
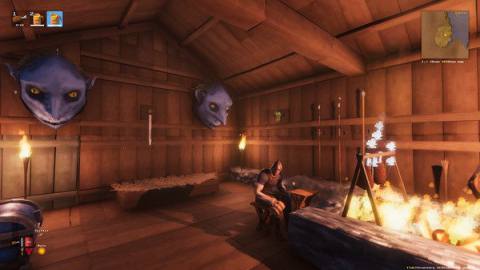
You can build directly onto dirt, but you also have the option of adding a floor to your build. Something to bear in mind when making this decision is that campfires can only be placed directly onto the ground (because placing one on a wooden floor would obviously be a terrible idea). Therefore, if you’re thinking of setting yourself up with all the creature comforts indoors — which at this point in the game means a workbench, a bed, and a source of heat — remember to leave a gap in the flooring where a fire pit can go.
However, be aware that an indoor fireplace can cause problems if the building isn’t properly ventilated (see the section on “Ventilation”, below).
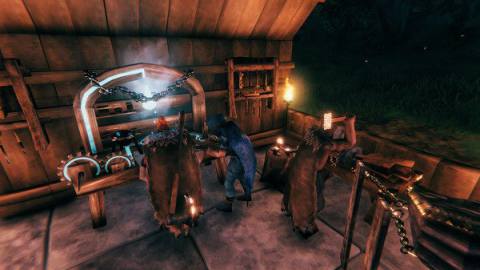
You should also craft a cooking station as soon as you can. This allows you to turn raw meat into edible food — or coal, if you leave it for too long. Coal is actually a useful crafting resource, though it’s a bit of a waste of your precious food reserves early on in the game.
One word of advice: the cooking station needs to be placed directly over the campfire to cook the meat.
Building needs to consider: stability, smoke build-up, and more
Once you’ve got somewhere to shelter in the short-term, it’s time to start thinking about more durable accommodation.
Unfortunately it’s not enough to prop up a lean-to shack and call it done. Sooner or later, you’re going to need to upgrade your housing.
Here are a few of the systems you’ll want to keep in mind as you plan for more durable builds:
Preparing the ground and laying foundations
The terrain in Valheim is naturally rugged, not unlike its Viking inhabitants. Since a stable base greatly increases a building’s longevity — and conversely, an unstable structure will quickly fall down around your ears — it’s worth taking the time to level out the ground before you start building a long-term base.
Once you have a workbench you can craft a hoe. This can be used to lower the ground level by a small amount, though ideally you still want to start in a reasonably flat area. Pickaxes are more effective at this once you can construct them.
You can also construct a foundation out of wooden poles. This allows you to build above ground level, as well as giving the building greater durability and stability.
Wooden poles are made out of core wood. This isn’t quite as common as the starting wood resource, but becomes available as soon as you have a stone axe and access to pine trees.
Poles can be made to variable lengths, and can be placed horizontally or vertically to create a foundation and the shell of a building. You can also place additional poles, walls, and beams to reinforce an unstable part of a building.
Structural stability
You can check the stability of a building piece after placing it. With the hammer equipped, hover over the piece you want to test, but don’t click anything. The piece will light up and change colour.
Stability is indicated using a traffic light system. Green pieces are sturdy and secure, while red pieces are on the verge of collapse. Yellow and orange pieces are good enough for now, but will need further reinforcement before they can reliably support more pieces.

Even with the best foundation, there comes a point where you can’t build safely any more. Each building part seems to have a support limit of around six other pieces before it becomes unstable.
Ventilation
Since you can craft a campfire from the very start of the game, you’ll likely have some kind of fireplace in basically every building you construct. The benefits are obvious: heat, light, somewhere to cook. However, you should be aware that smoke can cause problems over time.
In an extremely realistic move even for a survival game, Valheim has smoke from indoor fires build up in the room unless it has some way of escaping. If too much smoke accumulates, your character will actually begin to lose health while inside the room — which, obviously, is the exact opposite of what you’re going for when constructing a shelter.
There’s no way to construct a chimney in Valheim, so the best way to ventilate your house is to leave a gap in the roof somewhere that allows smoke to escape. However, if the gap is directly over the fire then it becomes exposed to rain and other weather that can cause it to go out. Standing under an exposed place can also cause your character to lose the energy recovery benefit they receive when the game recognises they’re in a shelter.
To overcome this problem, ensure that your “chimney” space is placed well apart from any of the active areas inside the building: it shouldn’t be directly over the fire, the workbench, or any beds.
Building material decay
Any wooden building part not covered by a thatched roofing tile will decay when they become wet. (The only known exception to this is the wooden stake wall.) Since rain and snow are prominent features of the climate in most regions of Valheim, chances are this is something you’ll eventually have to deal with.
A little advance planning also goes a long way to preventing building decay. If you lay foundations and use poles to hold up the structure, you can construct a building roof-first. You can then add the wooden walls in later.
There are also two pieces of good news with regards to decay. First off, decay alone can’t cause a wooden building piece to drop below 50% health (and the daily rate of decay will be quite slow). Secondly, while the affected wooden sections will appear warped and rotted, this won’t inherently detract from the structure’s utility as a shelter.
You can repair building parts using the hammer, rolling back the damage done by decay.
Stone buildings in Valheim
Of course, the ideal work-around to prevent building decay is to build them from stone rather than wood. In Valheim as in life, stone is far more resistant to the elements than wood, and fortunately it’s not at all hard to find right from the very start.
To construct stone buildings, though, requires additional tools. The stonecutter only becomes available once you have access to iron, and required a workbench nearby in order to place and use it. You can then construct all the same basic building parts (walls, floors, poles, etc.) from stone as well as wood.
There is a slight trade-off: stone is heavier than wood, and so will generally require a stone foundation to support it when building above ground level. (Wooden pieces can be supported by a stone foundation, but not the other way around in any quantity.) Also, while stone building pieces are more durable than their wooden counterparts, they don’t provide extra stability.
Iron is unlocked by constructing the smelter, which we’ve covered in our guide on crafting the cultivator. Therefore, you gain access to stone building materials and agricultural tools at basically the same time.
If you’ve been moving around a lot, constructing temporary shelters and exploring the world up until now, unlocking stone building materials and farming is a good point at which to think about establishing a more permanent base of operations.
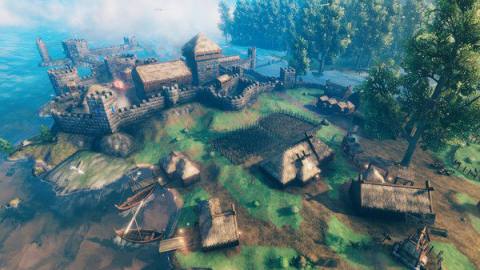
Advanced building projects
While it’s possible to be completely utilitarian with your Valheim builds, there is a surprising amount of room for creativity in the game’s building system.
This can encompass multi-level structures, as well as builds inspired by real-world medieval Scandinavian architecture.
The Viking longhouse is a simple yet practical style, and can meet most of your material needs in Valheim when it comes to shelter. But you can also construct a perimeter wall and build a multi-dwelling settlement inside, such as:
- A roundhouse
- A mead hall
- A castle bailey or keep
- A farming commune
- A cave house built into a cliffside
As long as there’s a workbench within range, there really are a great many possibilities. If you’re really looking for a creative challenge you could try faithfully recreating the Millennium Falcon, just like Reddit user Colonel-James-Parker has done.
For inspiration, I highly recommend The Pilgrimz Project, a YouTube channel dedicated to building in survival games. They’ve uploaded a number of advanced building tutorials for Valheim, including Viking longhouses, roundhouses, and mead halls.
How to turn off snapping while building
Building in Valheim is made slightly less arduous thanks to snapping. Snapping is turned on by default, and means that building parts placed near to each other will automatically connect together in what the game considers the most helpful way.
This can be very useful when you’re starting out, but by the time you’re constructing a whole settlement you might well have developed something of an overall architectural vision. Under these circumstances, snapping can get kind of annoying.
You can’t permanently disable snapping, but you can toggle it off temporarily by holding down the ‘Shift’ key when you place a building piece. This will cause the piece to go exactly where you put it, not where the game thinks you wanted it.
For more answers to your Valheim related questions, see our full guide hub page for the game.
The post Valheim: Building ideas and house design | Constructing your dream longhouse appeared first on VG247.


