

There are several hymnal rings puzzles found in various major locations around the Golden Apple Archipelago in Genshin Impact‘s Midsummer Island Adventure.
Hymnal ring challenges are just one of the uses of your Wind-Blessed Harpastum, a gadget you can obtain during Midsummer Island Adventure by completing the Summer Vacation: Proceed with Caution quest.
There are a total of 18 hymnal ring puzzles found around the Golden Apple Archipelago, four of which are on Minacious Isle.
- How to use the Wind-Blessed Harpastum to complete hymnal ring puzzles
- How to complete hymnal ring challenges on Menacious Isle in Genshin Impact
- Minacious Isle Hymnal Ring Puzzle #1 (both difficulty levels)
- Minacious Isle Hymnal Ring Puzzle #2 (both difficulty levels)
- Minacious Isle Hymnal Ring Puzzle #3
- Seelie Ring Puzzle on Minacious Isle (“The Winding Homeward Way” Quest)
How to use the Wind-Blessed Harpastum to complete hymnal ring puzzles
The core mechanic of these puzzles is fairly simple. Equip your Harpastum and throw it through the centre of the hymnal rings to complete a puzzle — often by hitting a target at the end.
There are, naturally, a few potential complications. Activating a ring identifies it with an element, and throwing the Harpastum will modify its element to match that of the last ring it passed through. If the puzzle’s final stage is an Elemental Target, then the Harpastum needs to pass through a matching ring last before hitting the target.
Some hymnal rings can be turned and need to be manually moved into position by the player character before they align properly to complete the puzzle.
Meanwhile, Twister Rings change the direction of the Harpastum according to where their arrows are facing. Some are constantly in motion under their own power, meaning you’ll need to time your throw properly to complete the puzzle.
Finally, Reprise Rings cause the Harpastum to split into two harpasta when it passes through.
Finding the solutions to these puzzles is largely a matter of trial and error, and as far as we’re aware you’re never penalised for making a mistake. However, if you’re keen to get them done or just really stuck, read on below for the solutions to all the hymnal rings puzzles on the Golden Apple Archipelago.
How to complete hymnal ring challenges on Menacious Isle in Genshin Impact
Minacious Isle needs to be unlocked to the second level before most of its features become available. Once you uncover the whole island map, you can begin attempting the hymnal ring puzzles.
There are three environmental hymnal ring puzzles on Menacious Isle, plus the “Seelie Ring” puzzle that’s part of the quest The Winding Homeward Way.
Minacious Isle Hymnal Ring Puzzle #1 (both difficulty levels)
The first Minacious Isle puzzle is located on the south side of the island’s central beach. It features three hymnal rings and a target.

The rings in this puzzle can all be rotated 90 degrees clockwise at a turn. To complete this puzzle, rotate the left-hand target three times and the right-hand target twice. Leave the central target alone, as it’s already in the correct position.
Stand on the inset stone on the ground to activate the puzzle and throw your Harpastum through the left-hand ring. It will travel down the line and hit the target, at which point the nearby Common Chest will unlock.
Some time after completing this puzzle, it will respawn again at a higher difficulty level. In this iteration of the puzzle there are five turnable rings, which once again can only be turned 90 degrees clockwise at a time. There are also two fixed rings, and two targets.
To set up the correct solution, run over to the turnable ring furthest from the activation stone and turn it twice. Then, go to the ring directly to the right as you’re facing the last one and turn it once.
Go back to the starting point and turn the ring directly to the right of the centre ring three times. Finally, interact with the central ring in front of the activation stone to activate its Reprise Ring power.
Stand on the activation stone and throw your Harpastum through the Reprise Ring. The two halves will travel down the parallel paths created by the remaining rings. They’ll hit the two targets a second or so apart. Once both targets are down, the nearby Precious Chest will unlock.
Minacious Isle Hymnal Ring Puzzle #2 (both difficulty levels)
The second puzzle is located on a mountaintop in the north of the island’s western side. It features only two rings, neither of which can be turned, and a target.

Start the puzzle by standing on the activation stone and the Twister Ring directly in front of you will begin to rotate on its own. All you need to do for this puzzle is time your throw so that the Harpastium passes through the Twister Ring at the right moment. This will probably require some trial and error, but as a guideline you should be aiming to hit it face-on while the arrows in the Twister Ring are pointed to the right.
Once you’ve done this, the projectile will pass through the second ring and hit the target. A nearby Common Chest will then unlock.
Some time after completing this puzzle, it will respawn again at a higher difficulty level. This iteration moves the target to the other end of the course, and replaces the original target with a third, turnable ring that can be rotated 90 degrees clockwise. The other two rings still cannot be manually rotated, so don’t worry about them for now.
To complete this version of the puzzle, rotate the new ring (which is the furthest to the right as you face the puzzle) through three rotations. Stand on the activation stone and throw your Harpastum through that turnable ring you just adjusted.
Unfortunately, it’s difficult if not impossible to do this while keeping the Twister Ring in view. Therefore, your best bet is probably to spam your throws as quickly as you can until you manage to get the timing right and hit the target. An Exquisite Chest will then unlock nearby.
Minacious Isle Hymnal Ring Puzzle #3
The third puzzle takes place on a cliff edge above the island’s south-western beach. Your aim here is in theory simple: to target your Harpastum through a single hymnal ring, and hit a target on some rocks out to sea directly below it.
All you have to do here is manage your shot through the ring so it doesn’t miss or bounce back. You’ll need to aim higher than you probably think, either aiming at the upper edge of the ring or slightly above it, in order to hit its centre by the time the projectile reaches it.
After you hit the target, the Exquisite Chest next to the puzzle’s activation stone will unlock.
Seelie Ring Puzzle on Minacious Isle (“The Winding Homeward Way” Quest)
To activate this quest, head to the area just above the inland lake partway up the island’s western mountain.

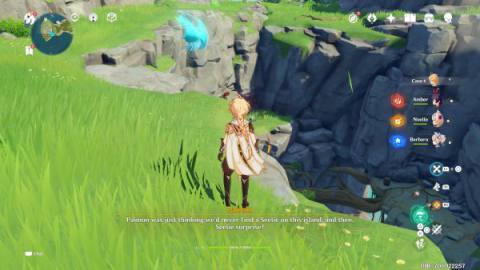
You’ll encounter a Seelie here; follow it and investigate the area when prompted to begin the Seelie Ring Puzzle.
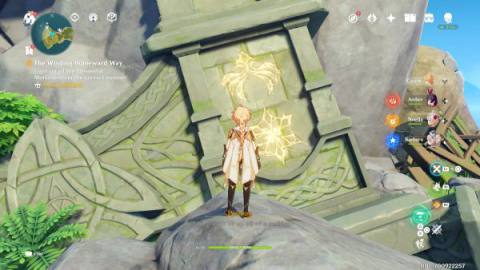
Your prompt for this stage of the quest is to “Light up all the Elemental Monuments in the correct order.” There are three rings on the ground. The elements of the rings are important this time, with Hydro (dark blue) on the left and Pyro (red) on the right when faced from the cliff side, which is where you should stand to complete the puzzle. The central ring doesn’t have an element, but can be rotated through different numbered positions when interacted with.
First, activate the Cryo and Anemo monuments by simply interacting with them (in that order), as they’re at ground level.

To activate the Pyro monument, set the central ring to Position 2. Throw the Harpastum through the Pyro ring to activate the Pyro monument, which is one the overhanging cliff above.

Finally, to activate the Hydro monument, set the central ring back to Position 1 and throw the Harpastum through the Hydro ring to activate the Hydro monument, which like the Pyro one is on the underside of a cliff overhang.

Defeat the enemies that spawn and follow the Seelie through the portal that’s just opened, destroying some debris when it blocks your path.


Eventually the Seelie will settle on a platform, a Luxurious Chest will spawn, and the quest will complete.
The post Genshin Impact: Minacious Isle | How to complete hymnal ring puzzles appeared first on VG247.


