

Destiny 2 finally has its own transmog system, fulfilling a long-awaited playerbase request.
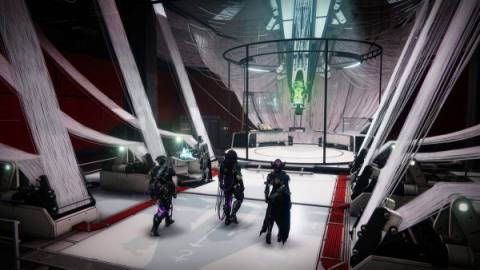
Play the newly-released Season of the Splicer for the first time and you’ll be prompted to complete the Armor Synthesis introductory mission. At the end of this, the new season vendor Ada-1 will move into the Tower, bringing the Loom along with her. The Loom is the home of the transmog system (also called Armor Synthesis).
But before you can use the Loom, you need the materials to work with. And that means collecting a resource called Synthweave.
- How to earn Synthstrand, Synthcord, and Synthweave in Destiny 2
- How to create Ornaments using Synthweave in Destiny 2
- Armor Synthesis and Shaders
How to earn Synthstrand, Synthcord, and Synthweave in Destiny 2
In-story, Synthweave is the crafting component used in Armor Synthesis. In practice, however, it’s more like a new currency in Destiny 2. Once you have a certain amount of it, you in effect use it to pay to decorate your armor.
However, Synthweave isn’t just out there in the world waiting to fall into your open hands. The raw form of this component is called Synthstrand, which you quite simply earn from enemies you defeat. With the new season, it seems that you can earn Synthstrand from just about any successfully enemy encounter in Destiny 2.

The next step is taking Synthstrand back to the Tower with you and talking to Ada-1. For 150 Synthstrand, she’ll set you a (class-specific) bounty and give you Synthcord as a reward for completing them.
Once you have Synthcord, you can finally use the Loom. The Loom converts Synthcord into Synthweave, which can then be applied to your armor to create Ornaments.
Before we get in-depth on Ornaments, however, it’s worth noting that there are four sub-types of Synthweave you can make:
- Synthweave Template is used to make Universal Ornaments.
- Synthweave Plate is used to make Titan Ornaments.
- Synthweave Bolt is used to make Warlock Ornaments.
- Synthweave Strap is used to make Hunter Ornaments.
You can only equip Universal Ornaments and the ornaments specific to your character’s class. So when using the Loom, be sure you’re making the Synthweave variety you really want.
How to create Ornaments using Synthweave in Destiny 2
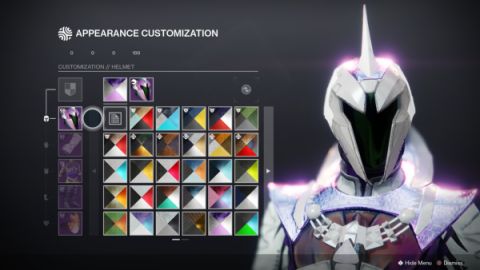
To make an Ornament using your fresh bundle of Synthweave, open the character screen and navigate to the appearance subscreen.
On this subscreen you should see a new Appearance Customization option in the top right.
Within this new screen, click on any armor piece to see its potential Ornaments. You can experiment with the ones you already have, as well as spending the appropriate type of Synthweave to unlock the ones you don’t (which are marked with a padlock icon). This will automatically create an ornament you can then apply or not, as you choose.
Armor Synthesis and Shaders
The new transmog system also simplifies and streamlines the use of shaders in Appearance Customization.
Single-use shaders are now a thing of the past, and instead any and all you’ve unlocked will be accessible from this screen.
You still need to pay 500 Glimmer to apply a shader to an armor piece (or 2,500 to do the whole armor set at once), but it’s still cheaper and easier than the old system.
For more on what’s new in Destiny 2: Season of the Splicer, check out our guide on everything we know about the new season so far.
The post Destiny 2: Synthweave | How to create Ornaments using Armor Synthesis appeared first on VG247.


