
The Heist leads to the end of Act One in Cyberpunk 2077 and the biggest twist you’ll see early on.
Now that you’ve completed The Pickup and The Information, it’s time to pay Dex a visit and set things in motion for The Heist.
This guide will contain some spoilers for the early game, so be warned.

Cyberpunk 2077 – The Heist guide
Before you get started, take this opportunity to go and sell any unused weapons and junk you have, get some new gear and Quickhacks, as this quest can go sideways quite quickly.
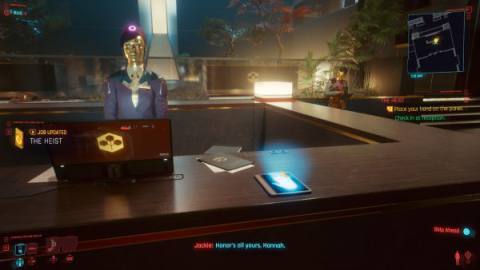
You’ll be visiting The Afterlife, a club where heralded Fixers and notables have drinks named after them. Follow Jackie around and head to the bar to have a drink while you wait to speak to Dex.
You can speak to the barmaid, Claire, who’ll make you a Johnny Silverhand cocktail while you wax lyrical about becoming so famous you can get a bevvy named after you – but you’ll need to be dead, too.

Eventually, Dex’s bodyguard will rock up and you’ll be taken to a booth to meet Dex and T-Bug. At the end of The Information, you were presented with a choice – stay loyal to Dex, or stiff him and split the proceeds 50/50 with Evelyn. You’ll have an opportunity to grass Evelyn in at this point, which will lead to Dex increasing your share from 30% to 40% – a sweet cut for someone so green in the biz as you.
All your efforts so far have paid off and Dex and T-bug have a solid plan to get you inside Konpeki Plaza undetected thanks to some false aliases and an alibi of travelling to see a Japanese arms dealer.
Getting to the hotel room
You’ll be taken to the hotel in a Delamain cab – the best of the best – which comes with a convenient combat mode if things get a bit hairy. Upon entering the hotel, Jackie will pass through a scanner and be stopped by one of the hotel guards, but just tell them you’re here for an arms deal and you’ll get through unscathed.
After you check-in, you can either go straight to your room or head to the hotel bar. There’s not much to gain here bar overhearing a few colourful conversations and one particularly special cameo by your man Kojima, so head to the lift with Jackie and ride it to the 42nd floor to your swanky pad.

Taking control of the Flathead
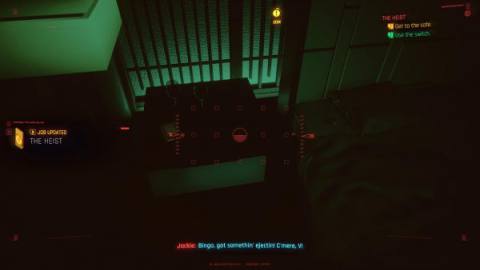
Once you’re settled in, you’ll need to take control of the Flathead and guide it around various rooms. This part is really easy – you’re essentially scanning for shaft grates that are really easy to spot. In one room, there are some maids in the way, so head to the terrarium cooling unit on the right-hand side to interfere with it and distract them before heading through the shaft on the left.
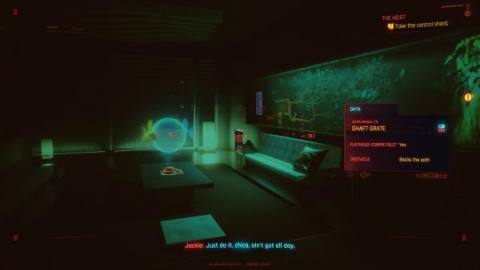
Eventually, you’ll reach the Dweller’s room and you’ll need to switch between two cameras and shafts to gain access to the room. T-Bug will talk you through this, so don’t get too stressed about it. You have the choice to neutralise the Netrunner, too, but again, the Flathead and T-Bug can take care of everything.
After that, have a quick chat with Jackie then it’s off to steal the Relic from Arasaka’s penthouse.
Finding the Relic
Providing you did everything in the Braindance with Judy and Evelyn, you should be able to waltz into the bedroom and find everything you need. If you run up the stairs to the left, you’ll find Yorinobu’s shirt and pants which you can use and in the bedroom, you’ll find the Kongou pistol on the bedside table. You’ll also find the Kotetsu no Ryu coat in the bathroom.
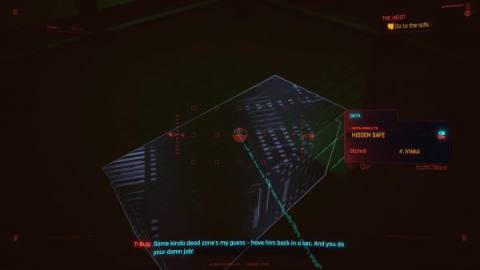
There’s also lots of junk and some Shards scattered about, so use your scanner to find them. Alternatively, you can patch all that and use your scanner to find the safe where the Relic is being held. The shit is about to hit the fan, so return to the back of the centre pillar near where the sofas are and hide inside to watch the rest of the events unfold.
This is your last spoiler warning!
Yorinobu rocks up to the room with his Robocop-esque pal, Adam Smasher, and none other than his old da, Saburo Arasaka. After a curt chat about Yorinobu essentially committing treason, he murders his father and calls in a code red. Strap in, because it’s about to get interesting.
Escaping the Konpeki Hotel
Once he’s left, V and Jackie need to make their escape, but T-Bug is quickly compromised. Head out the window and make your way towards the ladder, but don’t fret about reaching it as you’ll need to yeet yourself off the roof to escape the enemy.
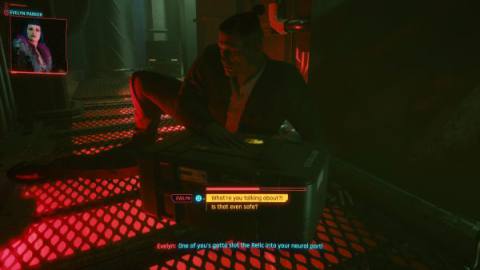
Eventually, you’ll come too and see that Jackie has been badly wounded in the fall and that the chip is compromised. Evelyn tells you to pop the chip in one of your heads, which Jackie promptly does after a quick prayer.
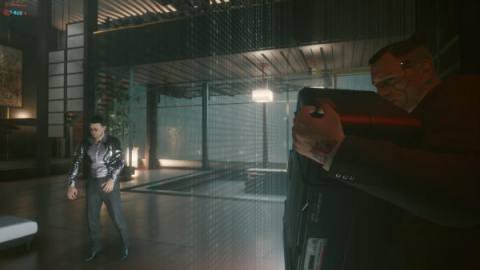
Despite the warning to take care of the guards, there are two ways to approach the next section – you can sneak your way around using Quickhacks and non-violent takedowns, or go in guns blazing. I went with the latter, because fuck it, but be wary that a larger enemy with the elevator key can glitch in and out of the elevator and area, making it hard to kill him.
For the stealth route, if you go for the guard on your left, Jackie will take down the other. If you have four Intelligence, you can hack into Konpeki Plaza’s systems via a terminal near where the guard was standing, or just crouch and stealth your way around.
Use the cameras and hack using the Breach protocol, which will let you hack enemy devices in each area. You can use the Distract Enemies Quickhack if you have it but remember to hide your bodies unless you want to be discovered.

Use the various desks and lower platforms to hide bodies and the use the various TVs to distract enemies. You can also hack enemy optics to change their route slightly. The first elevator won’t be useable, so enter the next area to find three guards.
At this point, using stealth to lure them away and take them out can take quite a while, so you might as well go in guns blazing. Ride the elevator then make sure you reload as enemies will appear as soon as you step out of it. You can choose to stay and fight everyone or make a break for it and run to the elevator to get to the parking garage. Run to your ride – or fight everyone, I’m not your mum – and make your escape.
What to do with Jackie’s body
The Delamain cab’s combat mode will initiate and you’ll need to take down some drones. Once all that’s dealt with, you’ll realise that Jackie is in bad shape and you can ask the cab to take you to a Ripperdoc. The AI will refuse, but you can still ask.
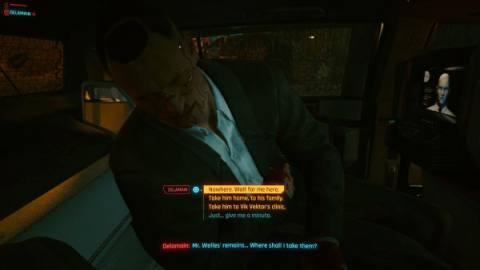
You can try to reassure him – or tell him he looks like a corpse – as well as tell him to think about Misty, his girlfriend. He’ll give you the Relic biochip before passing away, and the cab will ask where you want to take his body.
You can send Jackie’s body to his family, to Vik’s clinic or keep him in the cab, but the kindest thing seems to be to send him to his family. There are quests tied to the first two choices later in the game, so I suggest choosing either of these. Leaving him in the cab results in him being taken to his family, too, so there’s really only two choices.
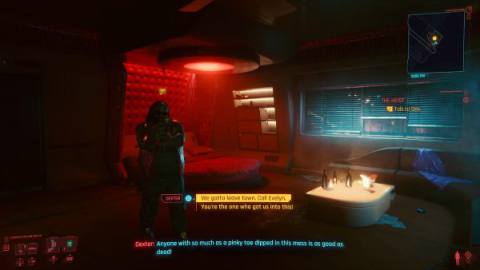
The No-Tell Motel: Welcome to Night City
Head up to Dex’s room where he’ll appear very on edge given Saburo is dead and you and Jackie and embroiled him in this mess. You’ll both agree you need to leave Night City but first, better go and wash that blood off your face.
As the trailer from last year’s E3 goes, you exit the bathroom and get knocked out, and the mission ends with Dex shooting you in the head. Welcome to Night City!

If you’re just getting started in Night City, you can check out our guides on which Lifepaths and Attributes you should choose, what the best character builds are, where to find your pre-order items, how to solve hacking puzzles and what the best weapons are.
You can also check out our guides on The Pickup and The Information questlines here, as well as how to improve your Street Cred, how to unlock and buy new vehicles, and how to Braindance and where to find the best Cyberware.
The post Cyberpunk 2077 The Heist Guide | Where to send Jackie appeared first on VG247.


